The BEST Guide to Installing Artificial Grass on your Lawn
So you want to install your own artificial lawn? Go for it! We’re here to help with this comprehensive guide.
This guide covers installing artificial grass over soil. So, where you are looking to replace your existing natural lawn with artificial grass. If you’re looking to install over other surfaces, then check out our other guides covering installations over concrete, decking and paving.
However, before we get started we need to let you know that this is no small task. If you have limited DIY experience then you might consider paying someone to install it for you. Having said that, a smaller size installation of up to 200 square feet should be within the capabilities of most DIYers.
Read this whole guide all the way through before starting your project.
Measure and Plan
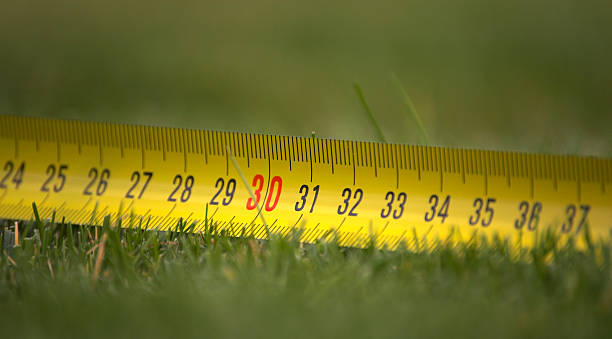
Before you start, take some measurements and identify any existing issues with the space you are planning to turf. If you’ve done some DIY before then you’ll know that it’s all about the preparation! Take your time on this important step.
Grab a measuring tape and take accurate measurements of the space. If it’s an irregular shape, then sketching it out on graph paper will really help. You’re looking to identify the major dimensions (width and length) and also the area in square feet.
You need to know the major dimensions so that you know how much artificial grass to buy. For larger installation like lawns, we’d recommend buying artificial grass in rolls. Each roll has a length and width.
If possible you should try to buy a roll that is wide enough to fill your space. This is to avoid having to manage joining the edges (seams) of two rolls. Joining seams is a tricky task, and if your installation is big enough to require this, then we’d recommend getting a professional to install the artificial grass for you. If you’re really keen on giving it a go, check out our guide to joining seams.
While you are planning, it’s good to know that artificial grass has a pile direction, much like carpets. This is to do with how the artificial grass is manufactured. Pile direction is the natural lean of the grass blades, and is typically in line with the direction artificial grass is rolled. If your space has a main viewpoint, for example looking from your house into your back yard, then plan to have the pile direction in line with this view. This is not mandatory, but artificial grass looks best when viewed this way.
Confused? Just imagine standing at the viewpoint (your house) an unrolling carpet in the direction of your yard. This is the direction in which the artificial grass roll should be laid.
Next calculate the area of your space on square feet. This is important because you need to know how much material to order to go under the artificial grass (more on this later). Area is simply width in feet multiplied by length in feet. If you have an irregular space, use graph paper to help calculate the area.
Assess the Site
Before starting the ground works, have a look at the site and have a think about and existing problems.
If the site has poor drainage and is prone to water pooling, then you will need to address this before installing your artificial lawn. Maybe all that mud is the reason you want an artificial grass lawn in the first place. A French drain is a perforated pipe that is laid in a shallow trench under the lawn. The perforations let water into the pipe, and the pipe carries the water away. Another option is to dig a big hole and fill it with loose rubble like broken bricks. The rubble has a lot of empty space and so gives the water somewhere to go.
If you have problems with weeds, then it would be a very good idea to treat the area with weed killer after you have cleared it of the existing turf. A weed mat will help keep the weeds down, but if you have a known problem then it’s best to address it before laying your artificial grass lawn.
If the site is sloping, then you may want to plan to level it out. A slope may cause the artificial grass to slump down the slope. If you can’t or don’t want to flatten the area, don’t worry there is a solution! At the top of the slope, at the level of the artificial grass lawn, embed a piece of treated 2 x 4 timber into the ground. When you install the artificial grass lawn, nail the top end of the lawn to the timber. This will stop the artificial grass from moving down the slope.
For a pin-sharp installation, consider installing a perimeter of 2 x 4 timbers. You can nail the artificial grass to these timbers to stop it from moving about.
Dig, Dig, Dig!
At the end of this article is a list of tools and materials you’ll need – we’ll assume that you’ve already got these to hand. Make sure that you have planned somewhere to put the turf you are going to dig out. Depending on the size of your yard, you might consider renting a dumpster.
Also it’s a good idea to put the artificial grass roll outside, so that its temperature can match that of the outside air. It’s best to install your artificial grass on a sunny day, as the sun will warm the roll and make it lay flat (and not curled).
Get digging! Dig out the old turf and the dirt underneath to a depth of 3 inches. If you need to dig a little deeper to reach a solid surface then go ahead, but make sure you order some extra base material (more on this later).
Clear the site of any stones or other debris, and do what you can to make it as flat and level as possible. A long (6 foot or longer) straight piece of wood with a spirit level on top is very useful for getting the area flat and level. Start at the lowest point, and drag the length of wood over the surface keeping it level according to the spirit level. Pretend to be a road grader and scrape away any high spots. Repeat as needed until the area is flat and level.
Now is the time to add a French drain if the site has drainage issues. Make sure that the drain takes the water away from the area, preferably downhill.
Fill it Up Again
First you’re going to lay the weed mat. This goes in first to prevent any remaining weed roots from coming up through the base. Use landscape staples every 6 feet or so to pin it to the ground. This helps stop the weed mat from moving when you’re installing the base.
Top tip: if you have pets it is essential that the weed mat goes down first. Otherwise, their urine will get trapped between the weed mat and the artifical grass.
Next you’re going to lay 2 inches of Class 2 Road Base over the area (also called Type 2 aggregate). As a rule of thumb, for a 2 inch covering you will need 15 pounds of Type 2 aggregate per square foot. If you had to dig out more than 3 inches of the original turf, then you will need more.
Carefully spread it out using a metal rake or similar. Take care not to disturb the weed mat. Use the trick with the 6 foot length of wood and the spirit level to keep it all level. Once you’re happy, compact the aggregate with a mechanical or manual compactor.
Next you’re going to lay 1 inch of compacted sand or decomposed granite. As a rule of thumb, you’ll need 7.5 pounds per square foot. Spread it out using a metal rake or similar. If you have installed a perimeter for 2 x 4 timbers, fill the granite up to the level of the timbers. When you’re done hit it with the compactor again. Give it a light misting of water with a watering can or hose.
If you don’t want to go to all this effort, you can skip the Type 2 aggregate and just lay 1 inch of compacted sand or decomposed granite.
Lay the Artificial Grass
At last!
But first, choose a reference edge. We will line this edge up first, and then cut the artificial grass to align with the other edges. If you have an ‘uphill’ side with an embedded piece of 2 x 4 timber, use this as you reference edge. Otherwise, pick the most noticeable edge (usually the edge one the side where the house is).
Position the artificial grass roll, and unroll it onto the prepared area. Line the artificial grass edge up with the reference edge you chose earlier. Pin the artificial grass in place using landscape staples. Pull the blades of the grass back and position the staple so that you are not stapling the actual blades down. Staple every 4 inches along the edges.

Top tip if your area is large: use a carper-layer’s kick board to help stretch the artificial grass and remove creases.
Once you are happy with the positioning, cut the artificial grass approximately 2 inches larger than needed on the remaining edges. Pin the artificial grass down by hammer a landscape staple for every foot of artificial grass.
When you are done, carefully trim the remaining edges, and pin them with the landscape staples.
Infill and Brush
Nearly there!
You may find that the grass blades have been flattened on the roll, and don’t stand up like natural grass. To remedy this, give the grass a brush with a stiff broom. If you have a large area you can use a power brush.
The last step is to apply infill. Infill is the material that you spread over the artificial grass after it has been laid. It isn’t always necessary, but can help add some cushioning to the artificial grass. There are special infills that help reduce the temperature of the grass, by evaporating stored water.
Phew! That was a lot of work but the end result should make it worth the effort.
Tools & Materials
Tools you’ll need to complete this project:
- A sturdy sharp knife to cut the artificial grass
- A shovel to dig out the existing turf
- A metal rake to help spread the substrate (more on this below)
- A spirit level and long length of straight timber (say, a 6 foot length of 2 x 4)
- Something to compact the base: rent a mechanical compacter or buy a manual one.
- A rubber mallet to hammer in the landscape staples
- A stiff broom or power brush.
Materials:
- The right amount of artificial grass (on a roll)
- Enough quality weed mat to cover the area
- Landscape staples
- Class 2 Road Base (also called Type 2 aggregate)
- Compacted sand or decomposed granite (granite is best if you can get it)
- Infill material – either a specialist material or dried sand